As an Amazon Associate, we earn from qualifying purchases. Some links on this site are affiliate links at no extra cost to you. Our recommendations are based on thorough research and editorial judgment.
What Are The Best Tips For Using Polymer Clay
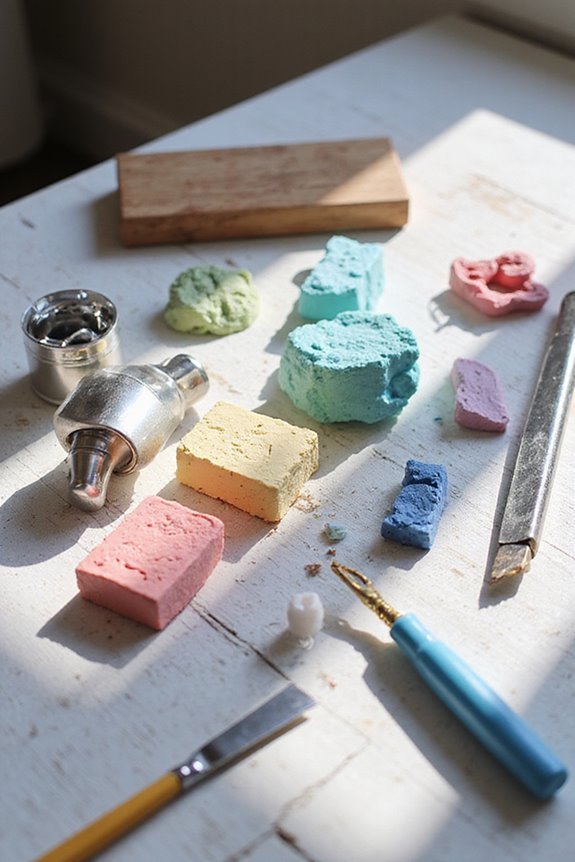
To get started with polymer clay, let’s choose high-quality brands like Premo or Kato. We’ll condition our clay by warming it in our hands and using a pasta machine for smoothness. 🌀 For texturing, we can use tools like texture sheets and needles. When baking, set the oven to 275°F (130°C) and bake for 15-30 minutes per ¼ inch thickness. 🕒 For a flawless finish, consider sanding and sealing your project. Stick around for more advanced tips!
Key Takeaways
- Select high-quality polymer clay brands like Premo or Kato for durability and vibrant color options.
- Always condition clay by warming and kneading to ensure a smooth, workable texture.
- Use tools like texture sheets, clay blades, and household items to create a variety of patterns and details.
- Bake polymer clay at 275°F (130°C) for the appropriate time, using a thermometer for accuracy.
- Finish projects with sanding, buffing, and sealing to protect the surface and enhance colors.
Selecting Quality Polymer Clay
When we’re choosing the right polymer clay for our projects, it’s important to take into account several key factors. 🎨 First, let’s look at the quality of the clay. We should consider brand comparison—some brands, like Premo, offer versatility and great color selection, while others like Kato provide strong, stiff options.
Here’s what to keep in mind:
- Durability: Look for clays that stay flexible after baking.
- Ease of Conditioning: Choose clays that warm up quickly for easier shaping.
- Color Variety: Select from brands with vibrant colors, including metallics.
Purchasing from reputable suppliers guarantees we’re getting fresh clay. Testing small amounts from new brands can help us avoid issues later. Additionally, selecting options that are non-toxic and safe ensures a worry-free crafting experience. Happy crafting!
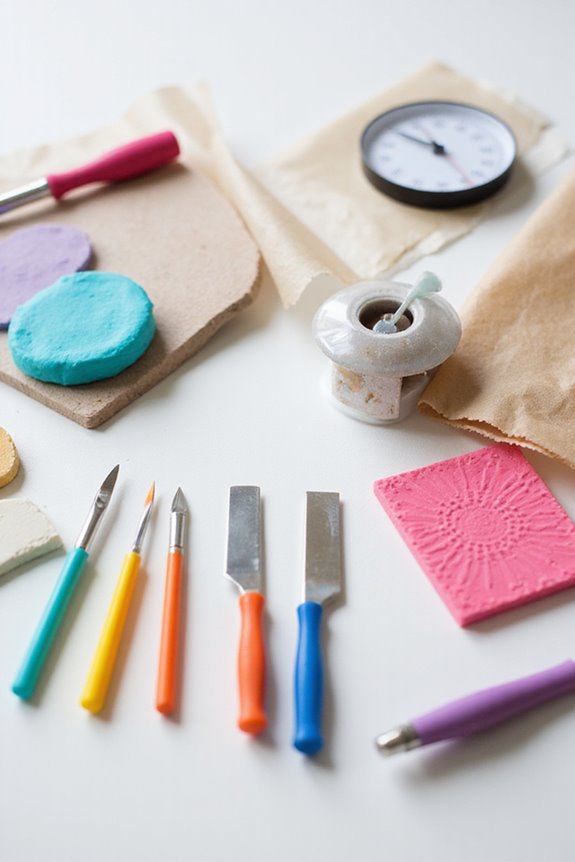
Techniques for Conditioning and Handling

To get the best results with polymer clay, understanding proper conditioning techniques is crucial. Let’s start with hand conditioning:
- Section clay into manageable parts (like one-fourth of a block).
- Warm the clay by rolling it back and forth in our palms, making balls and snakes.
- Press the clay with the palm or heel of our hand to avoid strain.
- Twist and wiggle the clay to activate its oils.
For tool usage, we can use a pasta machine. Just remember to cut the clay smaller than the machine width! Gently insert it to avoid damage.
Pre-warm the clay under low light or use oils sparingly to soften. Proper conditioning guarantees our clay becomes pliable, smooth, and perfect for crafting! Additionally, ensure the clay is non-toxic and compliant with safety standards to create a safe crafting environment.
Essential Tools for Texturing
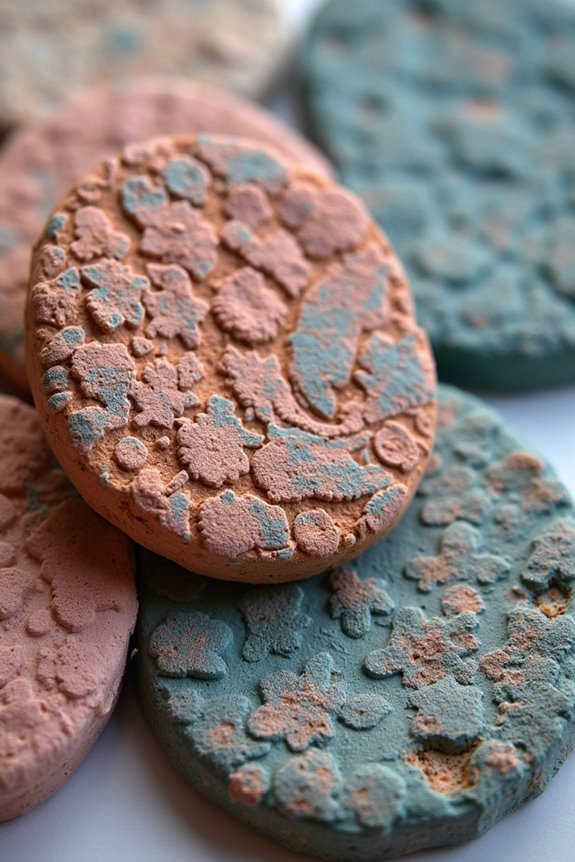
Building on our conditioning skills, having the right tools for texturing can really elevate our polymer clay creations. Here are some essential texturing tools we should consider:
- Texture Sheets: For ready-made patterns like lace or woodgrain.
- Texture Wheels: They create continuous patterns when rolled across the clay.
- Needle Tools & Ball Stylus: Perfect for adding fine details with precise lines.
- Clay Blades: Use these for carving textures and shapes accurately.
Don’t forget household items like fabric scraps or bubble wrap for unique textures. 😊 Experimenting with these embossing techniques can lead us to amazing results. Just remember, practice makes perfect, and with the right tools, our creations will truly shine! Additionally, ensuring that our tools are hypoallergenic options can enhance both comfort and durability in our projects.
Best Practices for Baking Polymer Clay
Baking polymer clay correctly is essential for achieving durable and beautiful pieces. ☯ We want to remember a few key practices to guarantee our creations cure perfectly every time.
- Preheat the oven fully to avoid uneven curing. Always check the oven temperature with a thermometer!
- Bake at the recommended 275°F (130°C), using surfaces like ceramic tiles or parchment paper to prevent sticking.
- For thickness, bake 15-30 minutes per ¼ inch, adding time as needed.
- Cover pieces with foil to avoid brown spots.
- Avoid opening the oven door while baking; monitor through the window instead.
- Finally, let pieces cool down completely before handling to avoid warping. Additionally, using organized storage solutions can enhance your crafting experience by keeping your materials tidy and easily accessible.
Finishing Touches and Surface Treatments

When we finish our polymer clay creations, it’s important to add those final touches that elevate our pieces from ordinary to extraordinary. 🎨 Whether we want a glossy shine or a textured finish, knowing how to treat the surface can make all the difference.
- Foiling gives shimmery effects; burnish foil onto black clay for striking contrast.
- Sanding and buffing smooth imperfections; start with coarse grit, then refine.
- Sealing with varnishes, like Fimo Gloss, protects while enhancing colors.
- Painting adds dimension; use alcohol inks or thin paints for vibrant effects.
Additionally, using high-quality tools such as polymer clay cutters ensures precise edges, which is essential for a professional finish. Don’t forget edge finishing techniques! They make our edges polished and professional. These surface embellishments and texture enhancements take our designs to the next level!
Storage and Maintenance of Polymer Clay
To keep our polymer clay in top condition, we need to pay attention to how we store and maintain it. 🏠 First, let’s make certain we’re keeping it in a cool, dry place, away from heat sources like radiators and sunny windows. Using appropriate storage containers is crucial. Soft, flexible plastic is best to prevent damage.
- Keep unused clay covered to avoid dust or hair contamination.
- Store different colors and types separately to maintain their integrity.
- For long term care, check periodically for any curing signs.
Let’s also use divided organizers for scraps, and remember that proper packaging protects our clay from unwanted blends. By following these tips, we can guarantee our polymer clay lasts longer!
Tips for Avoiding Common Mistakes
Maintaining our polymer clay’s quality doesn’t end with proper storage; making certain we avoid common mistakes is just as important for great results. Here are some tips to help us succeed:
- Clay Conditioning: Always condition your clay thoroughly. This means warming it up and using a roller or pasta machine until it’s smooth. Properly conditioned clay reduces cracks and makes shaping easier.
- Tool Hygiene: Clean our tools regularly—this prevents dirt and fingerprints from ruining our work. Use a damp cloth or isopropyl alcohol for a quick clean.
- Color Mixing: Mix colors properly and thoroughly, avoiding contamination. This enhances our final creation’s vibrancy.
- Workspace Cleanliness: Keeping our workspace tidy stops debris from ruining our projects and guarantees better adhesion. 😊
With these practices, we can achieve stunning results!
Frequently Asked Questions
Can I Mix Polymer Clay With Other Crafting Materials?
Like a painter blending colors on canvas, we can mix polymer clay with various crafting materials. However, we need to contemplate temperatures and techniques carefully to avoid mishaps and achieve beautiful, lasting results.
What Types of Designs Are Best Suited for Polymer Clay?
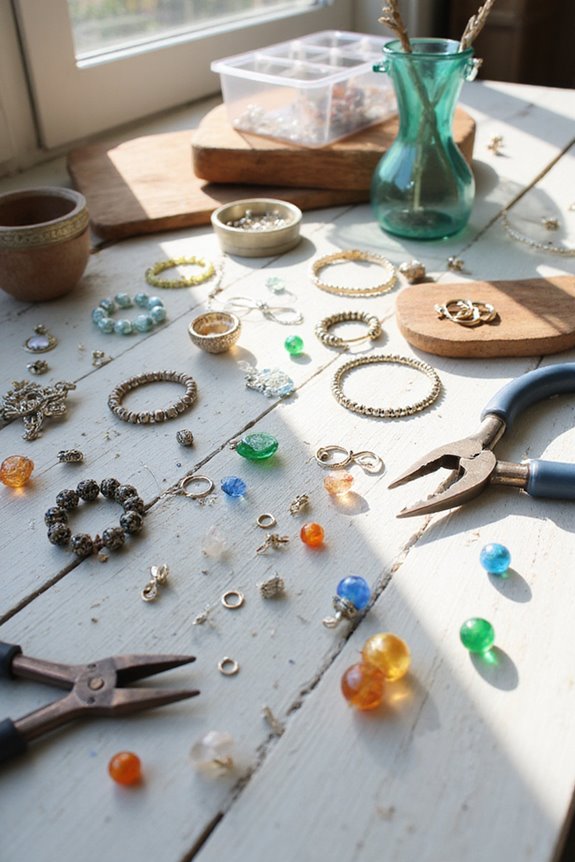
When we think about designs best suited for polymer clay, jewelry designs and miniature figures come to mind. Its versatility allows us to create detailed jewelry, as well as intricate, charming sculptures.
Is Polymer Clay Safe for Children to Use?
When it comes to polymer clay safety, we believe supervision is essential. With proper guidelines, like age recommendations and hygiene practices, our kids can explore creativity while staying safe. Let’s craft unforgettable memories together!
How Can I Fix Mistakes While Working With Polymer Clay?
When we encounter mistakes while sculpting, we can use targeted mistake correction techniques—like smoothing surfaces or reinforcing fragile areas—to enhance our creations. With practice, we grow more confident in maneuvering these challenges together!
What Are Some Common Applications for Polymer Clay Projects?
We’ve transformed our living rooms into galleries, while fashioning stunning jewelry just shy of museum-worthy! From whimsical home decor to elegant necklaces, polymer clay’s versatility keeps our crafty imaginations buzzing and our fingers delightfully messy!