As an Amazon Associate, we earn from qualifying purchases. Some links on this site are affiliate links at no extra cost to you. Our recommendations are based on thorough research and editorial judgment.

How To Use Stencils For Wall Art
Using stencils for wall art is a fun way to add flair to any room! First, select the right stencil material, like Mylar (7.5-10 mil), for detailed designs. Next, prepare your wall by filling any holes and wiping off dust. Choose acrylic or latex paint with a matte finish for best results. Use a stencil brush held at a 90-degree angle, applying light coats to avoid smearing. A few simple techniques can make a big difference in your artwork! 🖌✨ You’ll discover even more helpful tips ahead!
Key Takeaways
- Select the right stencil material based on your design complexity, such as Mylar for intricate designs or metal for simplicity.
- Prepare the wall by filling holes and cracks, cleaning the surface, and ensuring it’s completely dry.
- Choose appropriate paint types, ideally acrylic or latex, and use flat or matte finishes for best adherence with minimal seepage.
- Employ various application tools like brushes and sponges, using light pressure and thin coats for sharp, clean edges.
- Ensure proper stencil positioning and alignment using registration marks, allowing each layer to dry before adding additional coats.
Selecting the Right Stencils
When it comes to selecting the right stencils for your wall art, it’s essential to contemplate a few key factors. 🎨 I can’t stress enough how much the material impacts your project’s outcome. Here’s what you need to know:
- Mylar is flexible and durable, perfect for intricate designs. For detailed work, use 7.5 or 10 mil Mylar.
- If your design is simple, consider metal or wood stencils for sturdiness.
- Adhesive-backed Mylar offers a great grip on walls, while magnetic ones are reusable but less flexible. Additionally, selecting the right wood type can significantly affect your project’s overall quality and ease of use.
Recommended Products

Includes 7 reusable stencils designed for marking fire rated walls and smoke partitions on construction sites, helping crews quickly apply clear fire barrier identification across framing, drywall, and masonry surfaces.
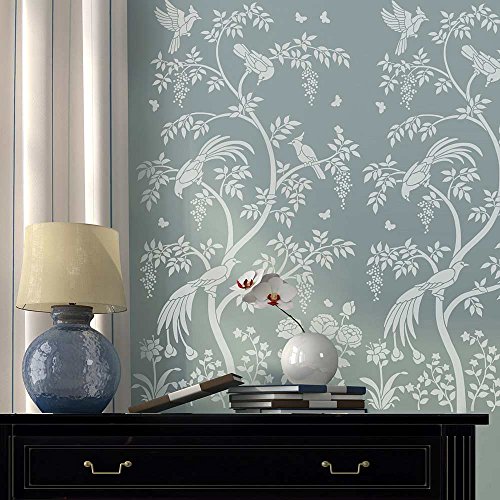
REUSABLE WALL STENCIL for painting your walls, ceilings and floors. Try wallpaper stencils instead of wallpaper and save hundreds on room makeover! Easy to use even for beginners. We offer free video tutorials. Each stencil comes with small Free Stencil ($4.95 value).

Reusable Wall Stencil for painting your walls, ceilings and floors. Try modern wall stencils instead of wallpaper and save hundreds on room makeover! Easy to use even for beginners. We offer free video tutorials and informative step-by-step blogs to help you with your project
Preparing Your Wall for Stenciling

Now that you’ve selected the perfect stencils, let’s focus on preparing your wall for stenciling. 🌟 Proper preparation is key to achieving a clean, professional look in your wall art. First, check the wall condition—remove any nails, hooks, or fixtures for a smooth surface. Fill any holes or cracks with spackle, then let it dry completely. Gently sand the patched areas to create a uniform surface texture.
Next, wipe down the wall with a damp rag to remove dust. Finally, make sure the wall is dry. If your wall has texture, smooth rough patches to avoid distortion of your stencil design. Additionally, consider using eco-friendly options for your spray paint to ensure a safe and environmentally conscious project. Remember, a well-prepared wall sets the foundation for stunning stenciled art!
Recommended Products

Comprehensive Drywall Skimming Blade Set:This drywall skimming blades kit includes 3 sizes-10”+24”+32” of skimming blades, the other 0.5mm spare blades of 3 sizes, a 28"-61" extensible handle pole, a high impact handle adapter, a 9” roller brush, a 4” putty knife, a 7” arc-shape bucket scoop and a multi paint stripper tool. All of the above tools are packaged in a hard cardboard box to carry easily
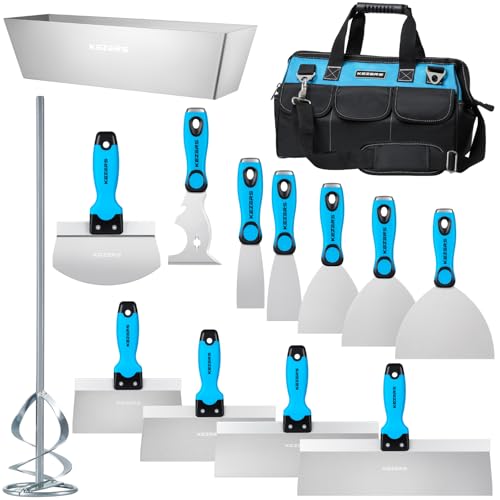
14PCS STAINLESS STEEL DRYWALL TOOLS KIT KEZERS Drywall Knife Set includes 5 putty knives (1.5", 2", 4", 5", 6"), 4 taping knives (8", 10", 12", 14"), 14" mud pan, 6" bucket scoop, 11-in-1 painter's tool, and 16" mud mixer, all housed in a durable tool bag. Stainless steel construction ensures durability for drywall finishing, taping, and joint compound application, making it ideal for drywall taping and finishing projects.

Package Contents : This drywall patch kit includes 2 Pieces of 2'' * 2'', 8 Pieces of 4'' * 4'', 2 Pieces of 6'' * 6'' , 2 Pieces of 8'' * 8'' repair patches. 1 piece jab saw, 1 piece drywall sanding sponge, 1 piece putty knife. This drywall tools kit has prepared almost everything for fixing the small drywall damages. You do not need to collect other tools to act in concert with the self adhesive patches to perfect the drywall defects. Time-saving and larbor-saving
Choosing Paint and Application Tools

Choosing the right paint and application tools is essential for achieving stunning stenciled wall art. 🎨 You want to use acrylic craft paint or latex paint, as both provide good adhesion and a smooth finish.
Here are some key points to take into account:
- Paint Types: Stick to flat or matte finishes to minimize paint seepage, while semi-gloss options can work for some designs.
- Application Tools: Use stencil brushes for precise work, sea sponges for texture, and foam rollers for larger areas.
- Technique Tips: Always remove excess paint from your applicator to avoid pooling, and verify your base coat is fully dry before stenciling. Additionally, using variety of brush sizes can enhance your creative expression when applying the paint.
With good paint types and finish options, you’re on your way to impressive wall art!
Recommended Products

PAINT & PRIMER-IN-ONE: Cascadia ZERO is an Ultra-Low VOC, Acrylic Blend Paint & Primer-in-One; save time with less coats

UNRIVALED SOLID WOOD DURABILITY - Unlike competitors using cheap MDF or particle board that swells in humidity, this 60 inch solid wood bathroom vanity is engineered for longevity. The moisture resistant bathroom vanity construction ensures your investment resists warping and rot, providing a lifetime of structural integrity in high-traffic master suites.

Built-In LED Lights with Soft Touch Control: This bathroom vanity features dual-side soft LED lighting for safe nighttime visibility without disturbing others. Convenient soft-touch switches on both sides and easy wall plug-in installation—no hardwiring needed.
Stenciling Techniques and Tips

Stenciling can seem tricky at first, but with the right techniques and a little practice, you’ll get the hang of it quickly! Here are some handy tips for successful stencil designs:
- Use a stencil brush held at a 90-degree angle. Dab or swirl it to apply paint, which helps avoid bleeding. 🎨
- Lightly load your brush, then blot it on a paper plate to remove excess paint. 💧
- Try dab or sponge painting for texture; it creates a more natural look.
- Apply multiple thin coats for sharper edges, instead of one thick layer.
- Always hold the stencil firmly to maintain its position during application. 🤲
- Consider using a self-healing craft mat to protect your work surface and enhance your precision while stenciling.
With these layering techniques, your wall art will turn out beautifully!
Recommended Products

Best Choice for Laser Engraving: LaserPecker LP2 Laser Engraver with upgrade galvo technology for faster engraving. Max engraving speed of 1417 "/min and frame / graphic preview speed of 8858 "/min. 0.05 mm compressed spot for more details. 3 resolution options (1 K / 1.3K / 2K) for perfect details level


Features: An artist-quality palette making mixing a pleasure, one inch high palette walls, lightweight yet strong material, and triple coated white enameled metal
Managing Patterns and Ensuring Precision

When you’re creating patterns with stencils, it’s essential to manage alignment and precision for stunning results. Start by using registration marks on your stencils to guarantee perfect pattern alignment. I line up my stencils directly over wet paint, checking for levelness before securing them with painter’s tape.
- Work down columns first, then across the wall in rows.
- Use light pressure to reduce paint bleed, applying minimal paint with a dry brush technique.
For stencil repetition, allow each layer to dry before applying the next. Also, keep the stencil flat against the wall to avoid gaps that can cause smudging. This careful approach makes a big difference in achieving seamless patterns you’ll love! 🎨✨ Additionally, using multiple light coats can enhance the overall finish of your stenciled artwork for a more professional look.
Frequently Asked Questions
Can Stencils Be Used on Textured Walls?
Absolutely, I’ve had success using stencils on textured surfaces! With the right stencil techniques, like light stippling and careful paint application, you can achieve great results while minimizing issues like bleeding and smudging.
How Do I Fix Mistakes While Stenciling?
Did you know that nearly 30% of DIY projects encounter mistakes? I’ve found that quick error correction techniques, like using a damp cloth or a round brush, make stencil repair so much easier and less stressful!
What Should I Do if Paint Bleeds Under the Stencil?
If paint bleeds under the stencil, I usually use painter’s tape to secure edges. I recommend lighter paint types and avoiding heavy application. For best results, I also consider the stencil materials and surface texture.
Can I Use Fabric Paint for Wall Stenciling?
I wondered, can I really use fabric paint for wall stenciling? After experimenting with various stencil techniques, I found it works, but results vary; adhesion and durability depend on different surfaces, so testing’s essential.
How Long Does Stenciled Paint Take to Dry?
When I stencil, drying time varies by paint types. Typically, thin coats dry within minutes, while thicker applications can take longer. I always wait 24 hours for base coats, ensuring everything’s perfectly ready for stenciling.