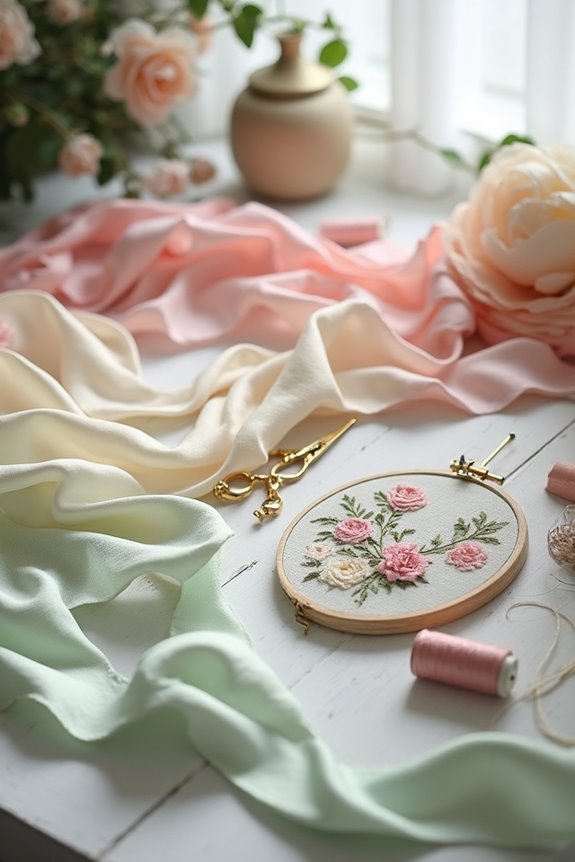
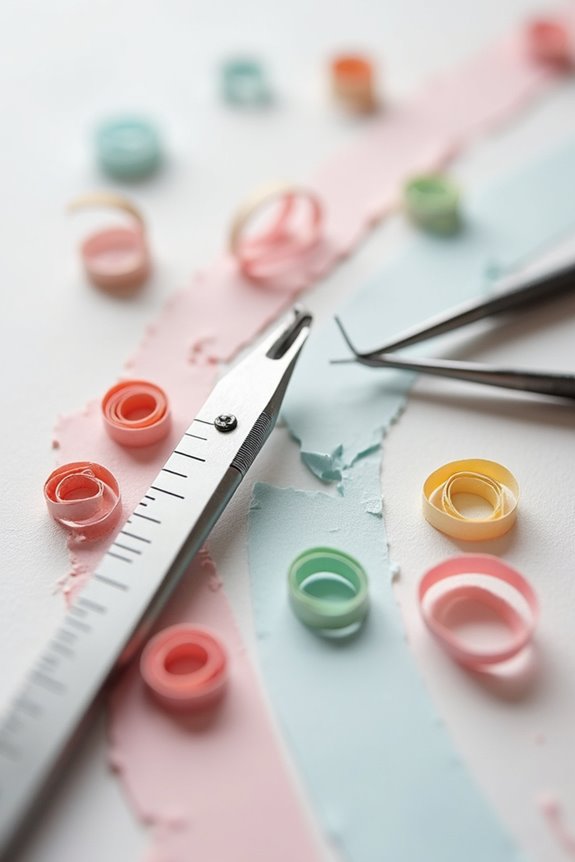
To master quilling, let’s first gather essential tools like slotted and needle quilling tools for rolling paper strips. 📏 Keep your strips less than 5mm wide for tight, precise coils. 🎨 Use tweezers for delicate positioning and apply glue carefully with a fine tip. Experiment with techniques like beehive quilling for filling spaces and twisted strips for leaves. ⏳ Staying patient will help improve your skills, and there’s so much more we can explore together!
Key Takeaways
- Utilize a slotted quilling tool for better coil alignment and consistent rolling of paper strips.
- Keep even finger pressure while rolling to avoid uneven shapes and maintain accuracy.
- Experiment with twisted strips and beehive techniques to create unique textures and fill spaces efficiently.
- Seal coil ends with a tiny dab of glue to ensure tightness and durability of your artwork.
- Use tweezers for precise positioning of delicate coils and to maintain detail in your designs.
Essential Tools for Quilling Success
Here’s a quick breakdown of essential tools we recommend:
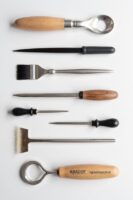
- Slotted Quilling Tool: Great for beginners; it holds paper strips securely.
- Needle Quilling Tool: Ideal for tighter coils without kinks, preferred by advanced artists.
- Tweezers: Perfect for handling delicate coils and precise positioning.
For paper strip options, we suggest:
- Precut Quilling Paper Strips: Available in various colors and widths like 3mm or 5mm for consistent quality.
- Self-Cut Strips: More advanced quillers can cut custom sizes, but it takes practice.
Make sure to choose acid-free, smooth paper to enhance durability. These tools and materials will help set you up for success in your quilling projects! 🌀 Additionally, using high-quality materials like durable paper can significantly improve the longevity of your artwork.
Mastering Basic Paper Rolling Techniques
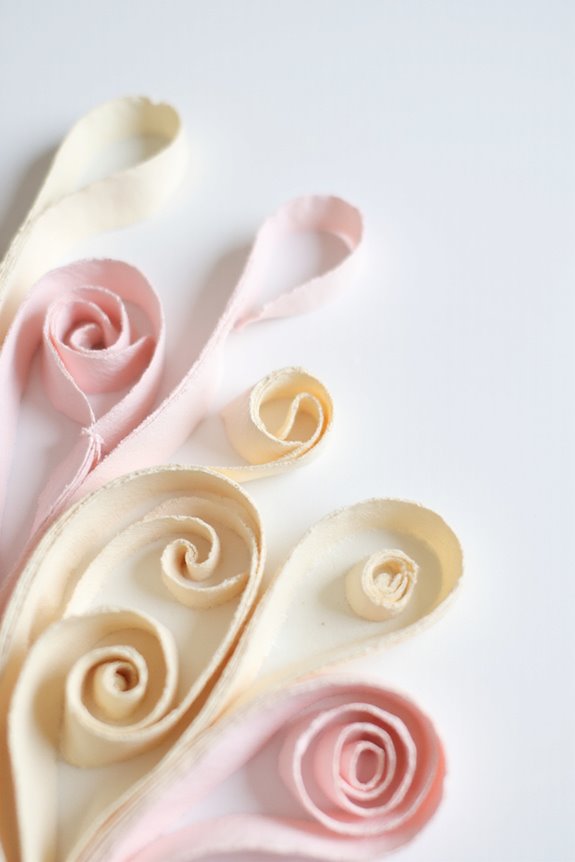
Mastering basic paper rolling techniques is essential for any quilling enthusiast looking to enhance their skills. 📜 To get started, we should focus on rolling paper strips tightly and evenly. Using a quilling tool or toothpick, we can maintain constant finger pressure while rolling, starting with the strip end firmly placed. This prevents those pesky “tornado” shapes.
After rolling, we’ll carefully slide the coil off the tool without letting it unravel. Sealing the end with a tiny dab of glue helps maintain coil tightness. Additionally, ensuring that the paper has a smooth, fine-grained texture will improve the overall quality of your quilled pieces.
Creative Paper Manipulation Techniques

When we explore creative paper manipulation techniques, we open up a world of possibilities for our quilling projects. 🌀 Utilizing various approaches not only enhances our art but also brings unique textures and forms to life. The beehive quilling technique lets us fill large spaces quickly. By rolling a long strip and creating multiple tight coils, we can form beautiful shapes. For more dimension, we can use twisted strips that add realism to leaves and butterfly designs. Don’t forget thicker strips for structural stiffness! Using 5mm or wider cardstock enhances color variations. Additionally, many quilling kits include instructional support which can significantly boost our confidence as we learn new techniques.
Precision Techniques for Control and Accuracy
As we refine our quilling skills, precision becomes essential in achieving the stunning details that define our artwork. 🎯 Accurate control over our materials and techniques can greatly elevate the overall appearance of each piece.
To achieve great coil alignment, we should use a slotted quilling tool for better rolling. Maintaining even tension is key to prevent those pesky “tornado” coils, which ruin accuracy. When applying glue, we must focus on glue precision—using fine applicator tips for minimal glue guarantees clean edges.
Handling delicate paper strips with tweezers can also prevent distortion. Finally, let’s keep our workspace organized and well-lit. A tidy area helps us focus better on those tiny details that make our quilling shine! ✨ Additionally, using a self-healing craft mat can protect your workspace and enhance the accuracy of your cuts.
Advanced Tools and Accessories to Enhance Your Art
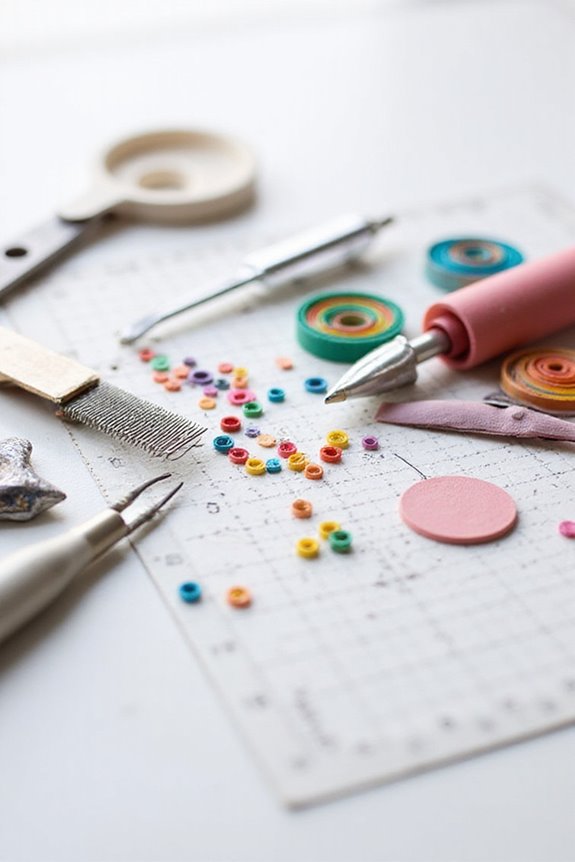
Quilling art flourishes with the right tools and accessories, making our creative process smoother and more enjoyable. When it comes to tool selection, we can benefit from specialized items like slotted tools for easy coil rolling and needle tools for precise guidance. Accessory integration, such as quilling combs and storage solutions, allows us to create intricate patterns while keeping everything organized.
We recommend using precision glue bottles for controlled application. Additionally, consider electric tools for consistency and reduced hand strain. Don’t forget about curling coaches and shape boards to help mold unique forms easily. With the right combination of these advanced tools and accessories, we can elevate our quilling projects to new artistic heights! ✂🎨 Furthermore, incorporating adjustable needle sizes can enhance versatility, allowing for experimentation with different textures and patterns in our quilling designs.
Effective Workflow Strategies for Quilling Projects
To create stunning quilling projects, having an effective workflow is essential for minimizing frustration and maximizing creativity. Here’s how we can do that:
- Project Breakdown: Break your project into stages, setting goals for each session to stay motivated.
- Pre-cutting Strips: Cut your paper strips to size based on the project’s depth, like using ½ inch for a 1-inch-deep box.
- Organized Workspace: Keep all tools within reach and organized for efficient work. 🛠
- Time Management: Use quick-drying glue to speed up bonding and allow overlap between drying and preparation.
- Incremental Assembly: Build your design in sections, making it easier to adjust placement as needed.
With these strategies, our quilling journey will be smoother and more enjoyable! 🎨
Tips for Building Patience and Skill in Quilling
Building our skills in quilling takes time, practice, and a bit of patience. To develop muscle memory, we should start with patience exercises like consistently rolling coils. Begin with basic shapes, practicing them repeatedly until we feel confident.
🖍 Key tips:
- Use tools like slotted needles to guarantee even tension; this helps with coil control.
- Allow glue to dry fully before moving pieces to prevent mishaps.
- We can improve our eye-hand coordination by observing and correcting coil irregularities.
Setting small, achievable goals in each session can make the process feel more manageable. Embracing mistakes is an essential part of learning, so let’s stay patient and enjoy our quilling journey together! 🌟
Frequently Asked Questions
Can I Use Regular Paper Instead of Quilling Strips?
Yes, we can use regular paper as quilling materials, but it may pose challenges like uneven edges and tearing. If we explore paper alternatives, commercial quilling strips often yield better results with consistency and ease.
How Do I Choose Colors for My Quilling Project?
As we plunge into the vibrant world of quilling, we’ll explore color theory and harmonious color combinations. By experimenting with shades and unexpected pairings, we can transform our projects into stunning visual narratives that captivate the eye.
What Types of Art Can I Create With Quilling?
We can create beautiful quilling art like floral designs, adding elegance to our greeting cards. From intricate flowers to vibrant patterns, the possibilities are endless, letting our creativity shine through every delicate coil and twist.
How Do I Store My Quilling Supplies Properly?
When organizing supplies, we should consider effective storage solutions. Using clear containers and compartmentalized boxes helps us keep quilling strips and tools tidy, making it easier to access everything we need for our projects.
Is Quilling Suitable for Children or Beginners?
Quilling’s a fantastic journey for children and beginners! With its numerous benefits, like fine motor skill development, we’ll master beginner techniques together, creating beautiful art. Supervised sessions make it safe and super fun for everyone!