As an Amazon Associate, we earn from qualifying purchases. Some links on this site are affiliate links at no extra cost to you. Our recommendations are based on thorough research and editorial judgment.

How To Create Jewelry With Natural Stones
Creating jewelry with natural stones is a fun and rewarding process! First, I prepare the stones by cutting flat slabs for easy shaping. 💎 Then, I drill into the stones, keeping the bit wet and applying light pressure to avoid chips. For setting, I love the prong or bezel methods, which protect and showcase the stones beautifully. Don’t forget essential tools like smooth jaw pliers and stainless steel jump rings! You’ll discover more techniques and tips as you go along!
Key Takeaways
- Identify the type of natural stone and its properties for appropriate use in your jewelry design.
- Use diamond-edged saws to cut flat slabs, shaping them to desired jewelry dimensions.
- Choose a suitable stone setting method, such as prong or bezel, to enhance the stone’s beauty and stability.
- Master drilling techniques, keeping the drill bit wet and applying consistent pressure to prevent damage.
- Employ wire-wrapping techniques to secure stones, using various wire gauges for creative designs and stability.
Preparation and Shaping of Natural Stones
When you’re ready to plunge into creating jewelry with natural stones, the first step is preparation and shaping. Start with stone identification; it’s essential to know the stone type and its properties. Cutting a flat slab from rough stones gives you a manageable surface for shaping. Securely mount the slab on a base to stabilize it during the shaping techniques. Use diamond-edged saws for the initial cuts, aiming for sizes that fit typical jewelry dimensions—usually a few centimeters.
✨ Tip: Inspect porous stones for suitability and repair needs before shaping. Additionally, consider using sterling silver wire to enhance the durability and aesthetic appeal of your finished jewelry pieces.
Gradually remove material to refine the stone’s silhouette, ensuring smooth contours. This careful preparation sets the stage for beautiful, durable jewelry!
Drilling Techniques for Natural Stones
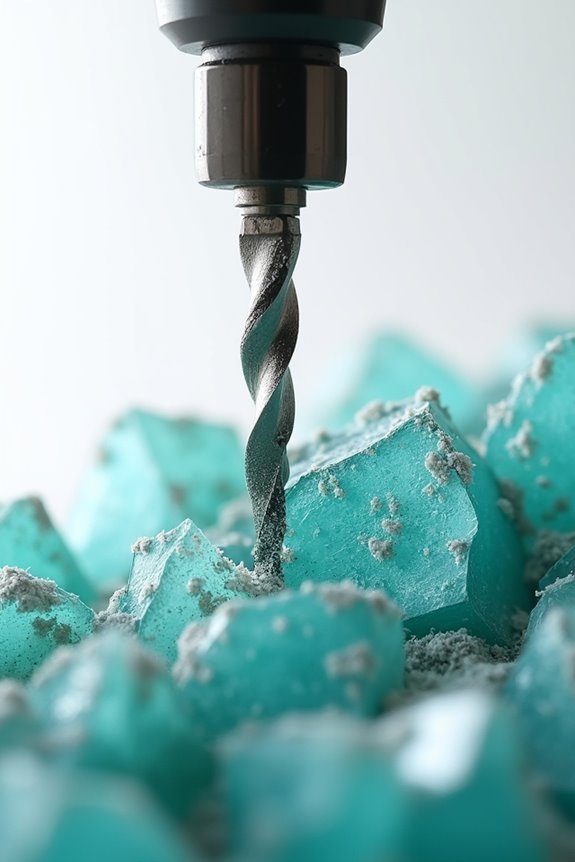
Here’s how to drill effectively:
- Keep the bit wet to avoid overheating. 💧
- Use light, consistent pressure to prevent chipping.
- Rotate the stone gently in water to clear away debris.
Practice on softer stones first; it’ll help you master the technique. 🎯 Maintaining a steady hand is essential to avoid cracks or uneven holes, so take your time! Additionally, consider using high-flow acrylic paints as a medium for creative exploration while drilling, as they can enhance the overall design of your jewelry.
Methods of Stone Setting
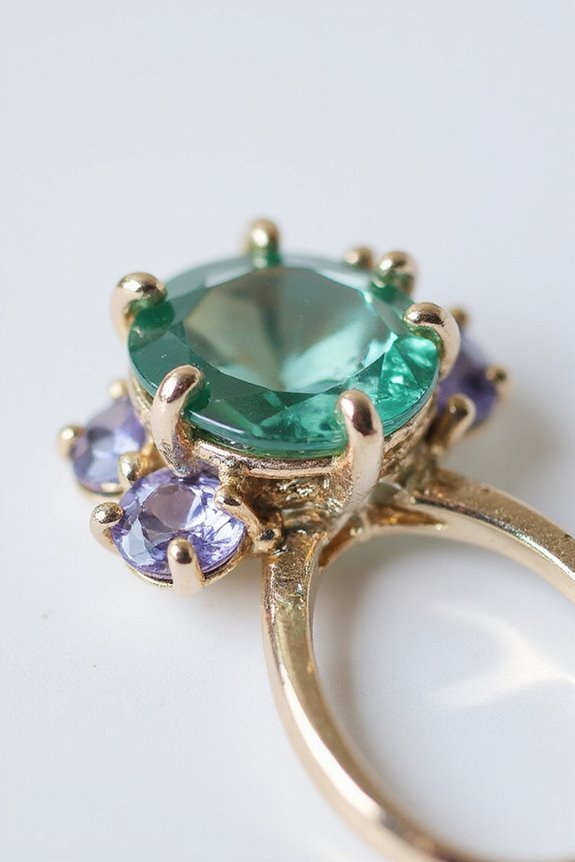
Setting stones is an essential skill in jewelry making that can really elevate your pieces. There are several methods to choose from:
- Prong Setting: Uses metal prongs to hold the gem, maximizing light entry for brilliance. You can use four or six prongs for different designs.
- Bezel Setting: Surrounds the stone with a metal strip, offering protection and stability. Great for fragile stones!
- Bead Setting: Creates small metal beads around the gemstone, perfect for a sparkling surface look.
- Cluster Setting: Groups multiple stones, usually with a larger centerpiece.
- Halo Setting: Surrounds a central stone with smaller gems, enhancing visual impact.
- Flush Setting: Embeds stones level with metal for a sleek effect.
Additionally, using 304 stainless steel wire can enhance the durability of your jewelry pieces while providing excellent corrosion resistance. Experiment with these methods to see what you like best!
Wire-Wrapping Techniques
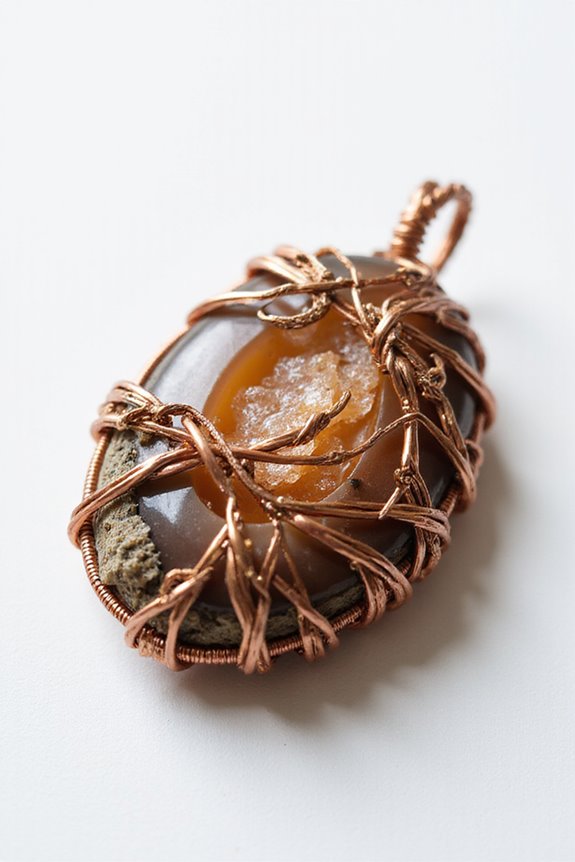
For basic wire wrapping, start with about 15 inches of 22-gauge wire. Make a small bend at the top to hold your stone, then wrap snugly around it several times. This secures your stone in place! You can twist and tighten the wire ends at the back for stability. Additionally, using a wire wrapping ring mandrel can help achieve uniformity in your designs.
When you’re ready for advanced wire wrapping, consider using multiple wire gauges. Incorporate decorative weaves in the bail area with 28-gauge wire. This adds texture and raises the visual appeal.
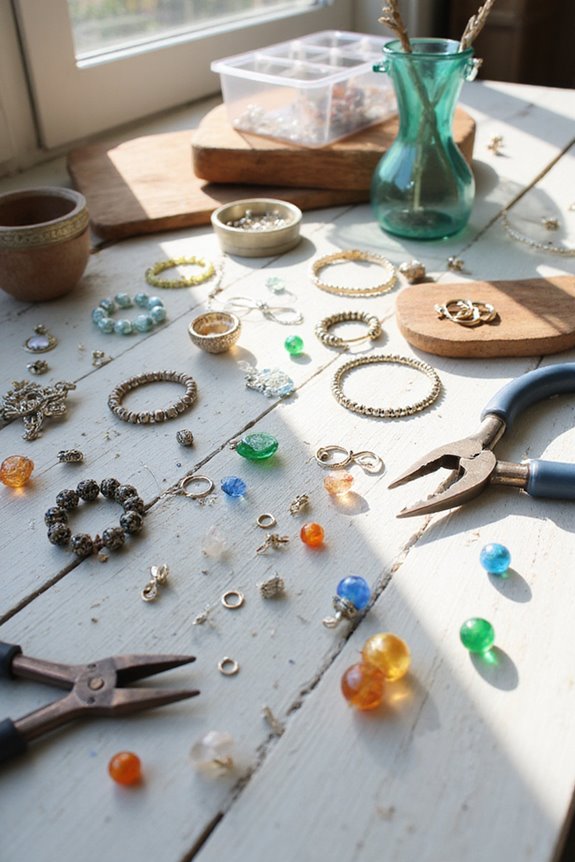
Essential Tools and Materials
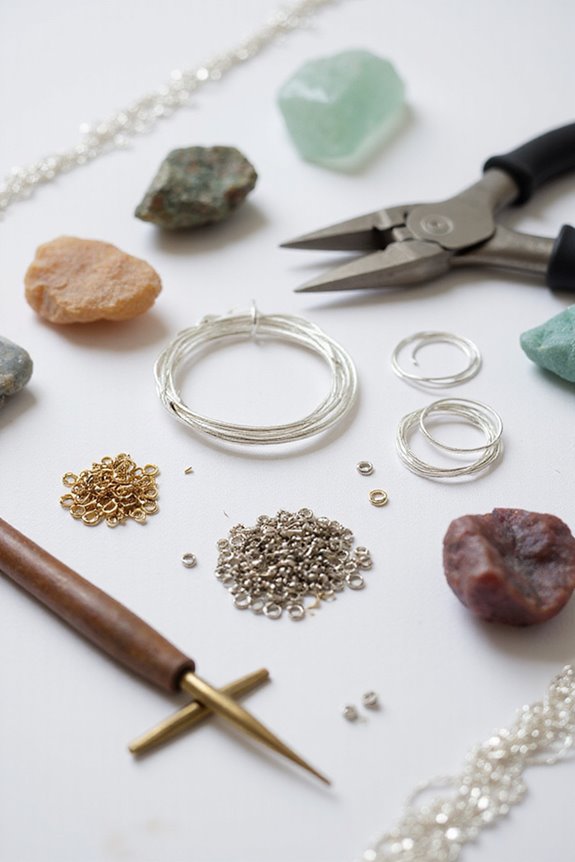
When you’re diving into creating jewelry with natural stones, having the right tools and materials is essential for success. 🛠 A well-equipped workspace not only makes your crafting process smoother but also enhances the quality of your finished pieces.
Tool Selection:
- Use smooth jaw pliers to avoid marking soft metals.
- Round nose pliers create loops without damaging your stones.
- Flat nose pliers help open rings cleanly.
Material Sourcing:
- Natural stone beads like quartz provide beautiful options.
- Silver-plated or precious metal wires in various gauges suit different techniques.
- Leather cords and silk beads offer flexibility in design. Additionally, incorporating stainless steel jump rings can enhance the durability and aesthetic appeal of your jewelry creations.
Design Considerations and Safety Practices
To create stunning jewelry with natural stones, it’s vital to balance design aesthetics with safety practices. 😊 I often find that selecting the right stones and settings can enhance not only the look of the piece but also its durability.
When considering color matching, aim for clear, inclusion-free stones that provide brilliance. Conduct a durability assessment by choosing harder stones, like quartz varieties, for everyday wear. Employ protective settings, like bezels, for softer stones to guard against scratches.
Make certain the weight is evenly distributed in your designs to prevent breakage. Finally, avoid chemicals that could harm your stones. Remember, thoughtful design not only enhances beauty but also guarantees the longevity of your jewelry creations!
Frequently Asked Questions
What Types of Natural Stones Are Best for Beginners?
When starting out, I recommend beginner stones like rose quartz, amethyst, and labradorite. These popular choices combine durability and beauty, making them perfect for crafting jewelry without the worry of damage during your learning process.
How Do I Choose the Right Wire Gauge for My Project?
Choosing the right wire gauge can feel like deciding the fate of worlds! For each project, I consider its suitability—thinner gauges for delicate work, thicker for durability. Always match wire gauge to my specific needs!
Can I Use Synthetic Stones in My Designs?
I love using synthetic stones in my designs. Their advantages, like consistent color and lower costs, really shine compared to natural stones. Plus, I appreciate the ethical considerations surrounding their use.
What Is the Best Way to Clean My Finished Jewelry?
Imagine your jewelry sparkling like new; for that, I use mild dish soap mixed with warm water. This simple cleaning solution is essential for effective jewelry maintenance, keeping each gemstone radiant and secure in its setting.
How Can I Incorporate Beads or Other Materials With Stones?
Incorporating beads with stones is easy! I love experimenting with bead selection and color combinations to enhance my designs. Mixing beads creates unique textures and visual interest, making each piece truly one-of-a-kind. You’ll enjoy it!