As an Amazon Associate, we earn from qualifying purchases. Some links on this site are affiliate links at no extra cost to you. Our recommendations are based on thorough research and editorial judgment.
How To Make Handmade Clay Beads
To make handmade clay beads, we’ll need air-dry or polymer clay, tools, and a clean workspace. Start by rolling small pieces into spheres or using cookie cutters for shapes. Remember to create holes with toothpicks before baking! Preheat your oven to 200-250°F, bake for 10 minutes to an hour, and let cool completely. For a polished finish, sand the beads and apply a clear coat for protection. Stick with us; we’ll explore more crafting tips! 🎨✨
Key Takeaways
- Gather materials like air-dry or polymer clay, rolling pins, and tools for shaping and piercing holes.
- Shape beads using hand-rolling, cookie cutters, or molds for different designs and textures.
- Create holes in beads using toothpicks or needle tools, ensuring accuracy in placement before baking.
- Bake beads at 200-250°F for the appropriate time based on size, then cool gradually to enhance durability.
- Finish beads by sanding for smoothness, buffing for shine, and applying a sealant for protection if desired.
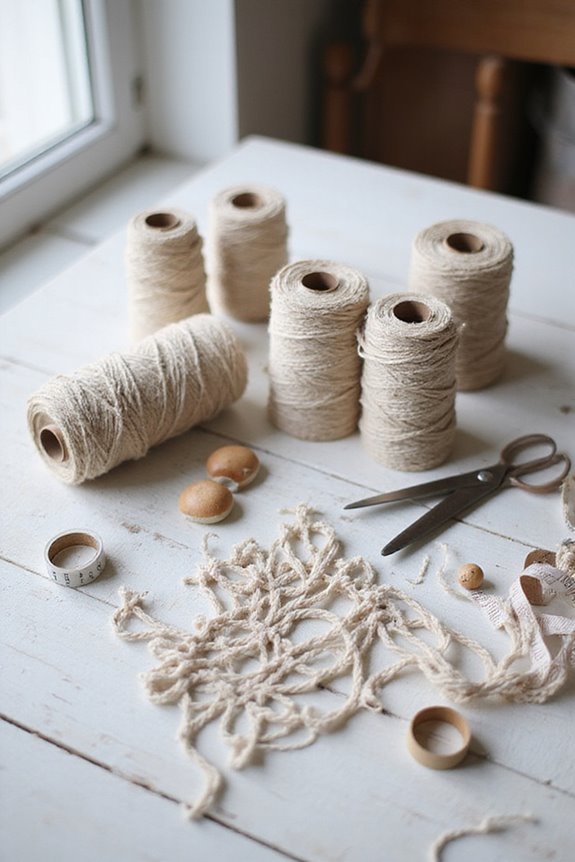
Materials and Preparation
When we’re diving into making handmade clay beads, we’ll need to gather a few essential materials first. Let’s consider different clay types like air-dry clay, which is beginner-friendly and doesn’t need baking, or polymer clay, which hardens in the oven for durable beads.
For our workspace setup, it’s crucial to use a clean, flat surface, like a silicone mat, so our clay doesn’t stick. We need tools too, such as rolling pins for flattening and skewers for making bead holes. Additionally, using non-toxic air-dry clay ensures a safe crafting experience as we create our beads.
Don’t forget to cover any unused clay with cling film to keep it fresh! By preparing our workspace and materials, we’re setting ourselves up for a successful crafting session. Let’s enjoy every step!
Recommended Products

【242oz Mold Making Kit】: This silicone mold making kit comes with 2 bottles of liquid silicone, each bottle containing 4000g/141oz of platinum cure silicone, as well as 6 bags mica powder,5pcs wooden mixing sticks,6pcs disposable protective gloves,a perfect slicone mold kit for beginners to try,satisfying your various needs.
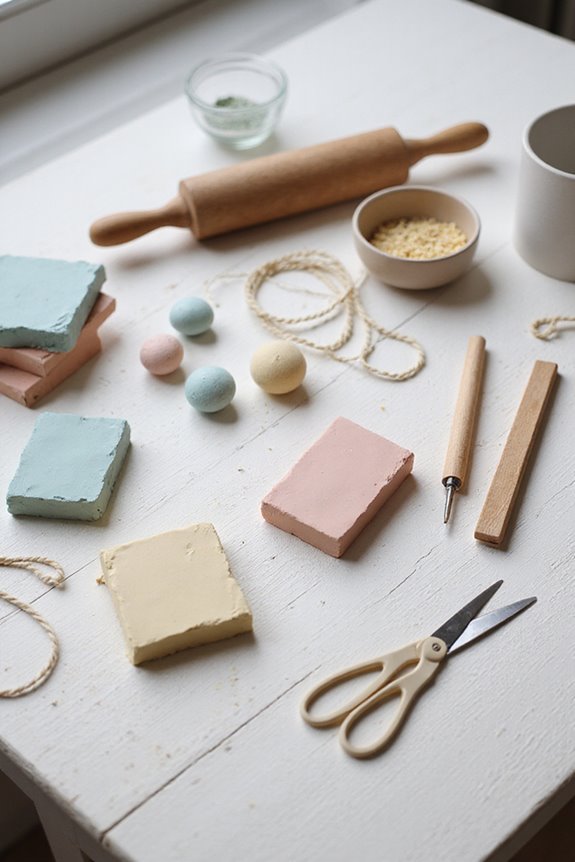
Shaping Techniques
With all our materials and workspace prepped, it’s time to explore various shaping techniques for our handmade clay beads.
- Hand-Rolling: We can pinch small clay pieces and roll them in our palms to create smooth spheres or ovals. Start with firm pressure, then lighten it for a refined shape. For color blending, twist thin snakes together before rolling for marbled effects.
- Rolling and Cutting: Roll conditioned clay flat, then use cookie cutters for uniform shapes.
- Texture Variations: Impress textures from leaves or fabric onto our beads before baking for added interest.
- Tools: Use molds for precision and tools to define curves or grooves.
Experimenting with these techniques will lead to unique and beautiful beads! Additionally, ensuring that the clay is non-toxic and allergen-free is essential for safe crafting, especially for children.
Recommended Products

MATERIAL- All-virgin low density polyethylene. Food grade safe. Non Toxic & Odorless- Freezer safe.
COLD WEATHER WARNING: Do not apply if temperature is expected to be below 50° for 48 hours following application. Keep a clean, NATURAL APPEARANCE and improve the DURABILITY of your concrete driveway, patio pavers, unglazed cement tiles, concrete block retaining wall, cast concrete, natural stone, or your unpolished garage floor.

Sculpey III polymer clay is a great introduction to oven-bake clay because it is soft and easy to work with after just a couple of minutes of kneading. It is excellent for beginners, general crafters, and kid/parent projects due to its pliable texture.
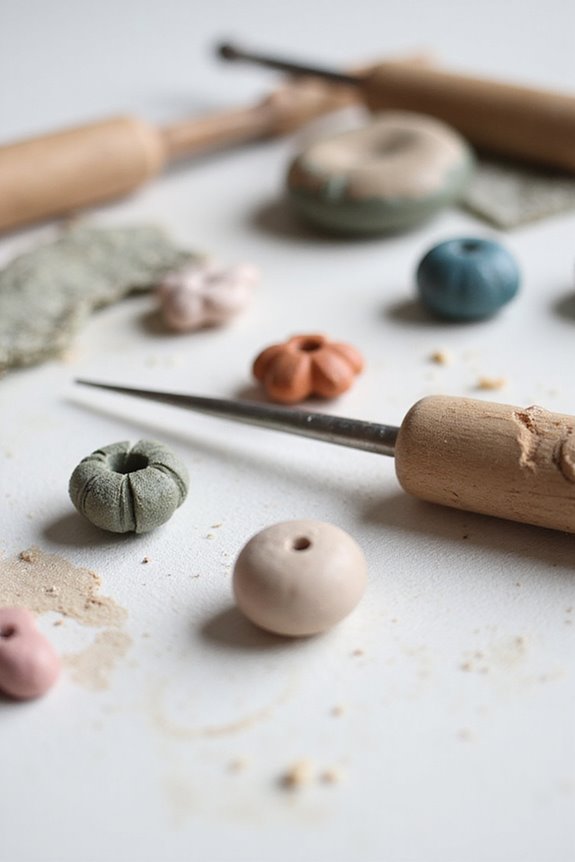
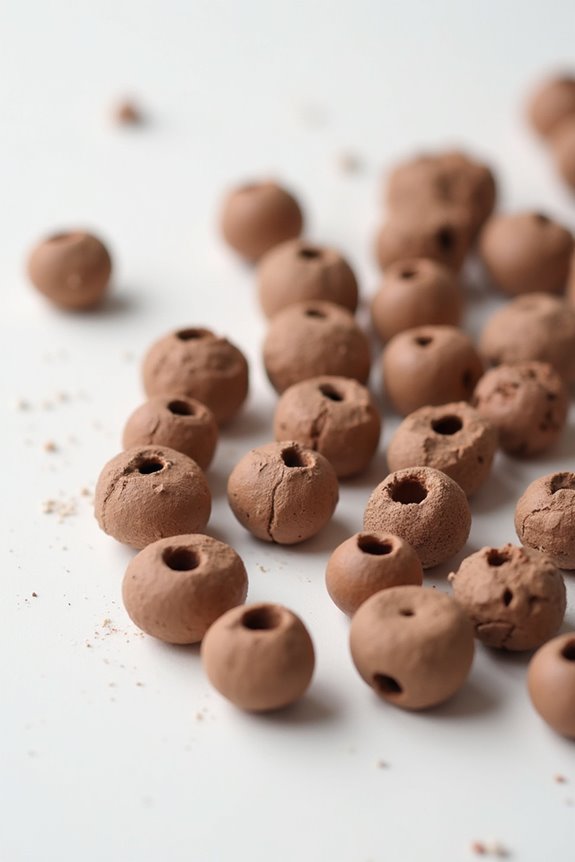
Creating Holes in Beads
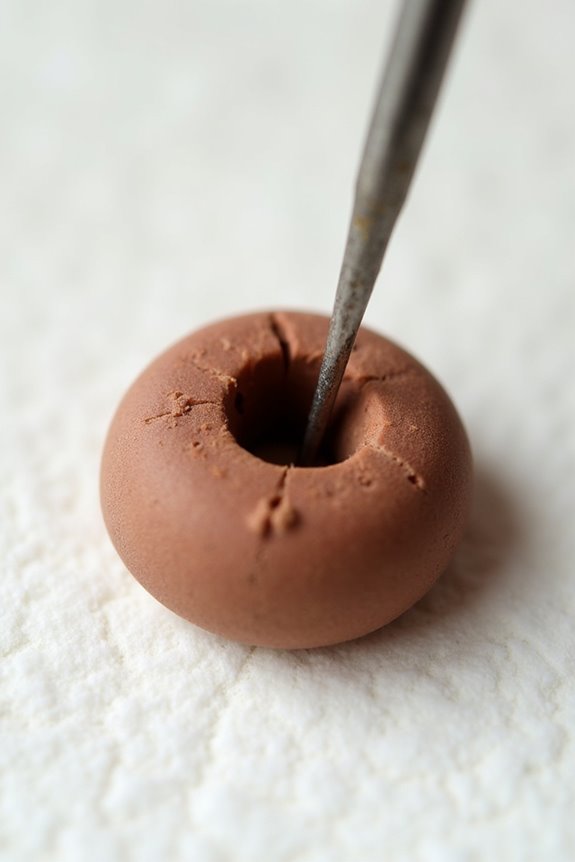
Creating holes in our clay beads is essential for stringing and designing our jewelry. 🌟 There are several techniques we can use, and we recommend trying out a few to see what works best for you.
- Tools: Toothpicks, bead pins, or needle tools are excellent for piercing holes.
- Piercing Techniques: Beads should cool before piercing to avoid distortion. We can twist the needle gently to create a straight hole.
- Mind Your Placement: Marking beads before piercing helps with accuracy.
For added precision, consider using a homemade piercing device. Remember, using properly coated tools helps reduce friction, making the process smoother. 🛠 After baking, we can enlarge holes carefully with fine drill bits, ensuring minimal cracking. Additionally, ensuring the proper thickness for strength is crucial for jewelry pieces to maintain durability during wear.
Recommended Products

PACKAGE INCLUDE: You will get 3 large plastic organizer boxes, 84 small storage containers with lids, and 3 sheets label to mark the product category. All plastic boxes are transparent, so you can easily find what you need. Each storage container has a hinged lid that is tightly sealed and easy to open, ensuring that stored items do not get dirty or spill out

Piercing Grabber Tool Kit: the 4 pcs piercing tool set includes a 3mm piercing ball grabber tool, a piercing barbell clamp tool, curved and straight forceps; Together they enable quick installation and replacement of various body jewelry types while maintaining proper hygiene standards, offering a practical solution for regular jewelry care

Comprehensive 9-piece Set: this versatile 9-piece set has everything you need for smooth piercings and effortless jewelry changes; Including a piercing barbell clamps, a 3mm piercing Ball Grabber Tool, a 4-Claw Piercing Grabber Tool and a set of straight and curved piercing taper in the most popular sizes (covers 14G-18G sizes), making it essential for any piercing kit
Baking Process
To start baking our clay beads, we need to preheat our oven to the ideal baking temperature, usually between 200-250°F (93-121°C). For consistent results, we’re going to use knitting needles or skewers to suspend the beads, preventing them from touching surfaces.
Let’s bake them for about 10 minutes to 1 hour, depending on size and brand, ensuring longer bake times increase their hardness. After baking, it’s essential to allow them to cool gradually. We’ll set them on a baking rack and wait several hours, letting them cool completely to avoid warping. Remember, proper cooling techniques enhance durability! 🌡✨ Additionally, using non-toxic options is crucial for safe crafting, especially when making items like beads that may come into contact with skin.
Recommended Products

3-TIER COOLING RACK FOR BAKING: The Nifty Cooling Rack will help you save valuable countertop room and time while cooking, enabling you to cool three shelves of baked goods like cupcakes, cookies, and cakes.

Versatile And Durable: The 3-tier cooling rack is a must-have for any baking enthusiast. Its sturdy steel construction ensures durability, while its versatile design allows for effortless cooling of cookies, cakes, bread.

Polyform-Sculpey Bead Baking Rack.
Finishing and Touch-ups
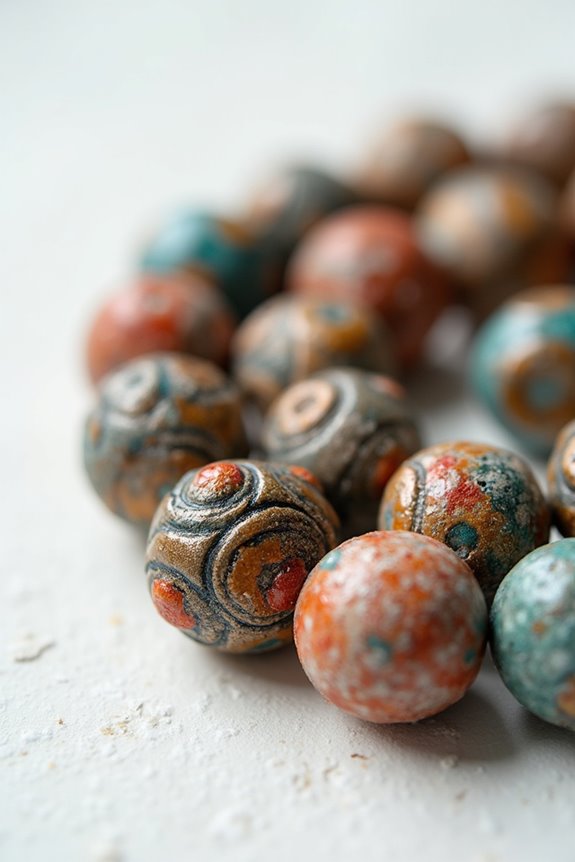
Before we plunge into the finishing touches, it’s important to guarantee our beads are completely cooled. 🧊 Once they’re ready, we can start sanding and smoothing them for a polished look. We’ll begin with 400-grit sandpaper, focusing on any fingerprints, blemishes, and uneven surfaces. Using various sanding techniques, we’ll progress to finer grits for that ultimate smooth finish.
For polishing methods, buffing our beads can lend a silky or glossy finish. Wax polishing works too, especially for intricate shapes. Remember to confirm our beads are blemish-free before waxing—polish enhances flaws. Finally, if desired, we can seal with a clear coat for added protection. High-quality stainless steel tools can also make the initial shaping of your beads easier and more precise. Let’s get those beads shining like they deserve!
Recommended Products

[Engineered for Extreme Weather] A reinforced 140° roof angle (vs. flatter 160° designs) increases snow load capacity by 30%. Multiple roof reinforcement bars enhance stability, withstanding winds up to Beaufort Force 12

✅ STAND ALONE SiO2 SPRAY: Nanoskin Nano Shock is the original SiO2 spray that changed the detail industry forever! It was an industry innovation that was an instant spray-on and wipe-off easy application in a unique liquid form. Nano Shock rejuvenates ceramic coated surfaces, or can be used on non-coated surfaces as stand-alone sealant.

For use inside or out on a variety of surfaces including sanded grout, flagstone, terra cotta, limestone, sandstone and more to protect against water, stains and slippage
Frequently Asked Questions
Can I Mix Different Brands of Polymer Clay?
Absolutely, we can mix different brands of polymer clay! Their compatibility allows us to blend unique properties, despite brand differences. Let’s experiment with combinations to discover new textures and colors for our projects!
How Do I Remove Dust From the Beads?
So, we’ve got our noble beads cloaked in dust, right? Fear not! With our arsenal of cleaning techniques—vacuuming, gentle brushing, and so on—we’ll whisk away that pesky dust like magical bead cleaners!
Are There Alternative Baking Methods for Polymer Clay?
Yes, we can explore alternative baking methods for polymer clay! Microwave baking and air drying are great options. Microwave baking offers a quick cure, while air drying lets us avoid heat altogether for our creations.
Can I Paint Beads After Baking?
Like a canvas awaiting color, we can certainly paint our beads after baking! Using various painting techniques and potentially bead sealing afterward enhances their durability and beauty, giving each piece a unique and vibrant finish.
How Do I Store Unfinished Clay Projects?
When storing unfinished projects, we should use the best storage methods like damp cloths and airtight containers. These unfinished project tips help maintain moisture, ensuring our creative endeavors remain workable for as long as needed.